Dying Easter eggs has been a yearly tradition in my family. It is so fun to see your creation as you lift if from the cup of dye. A few years ago, Kaylee refused to let anyone eat her special eggs. They sat in the fridge for months until I secretly through them away. This year, I decided to put the store-bought kits away and try something a little new. We tried two different techniques and they turned out spEGGtacular!
Tie-Dyed Eggs:
The pattern from a silk tie transfers onto the egg...amazing!
- An old silk tie...the tackier, the better!
- cloth cut into strips
- 3 Tbsp vinegar
- eggs
First, cut all of the lining out of the tie and cut it into squares big enough to wrap around an egg. Then, tightly wrap the silk around the egg (I did it like a piece of candy with the ends twisted). Next, tie two strips of cloth around the egg, one in each direction, to secure the silk.
Cover the eggs with cold water in a stainless steel or glass pot, add 3 Tbsp vinegar and boil eggs for 30 minutes.
Let cool, then the best part- unwrap your tie-dyed egg and see how it turned out!
- Hard boiled eggs
- electrical or duct tape
- at least two different colors of dye
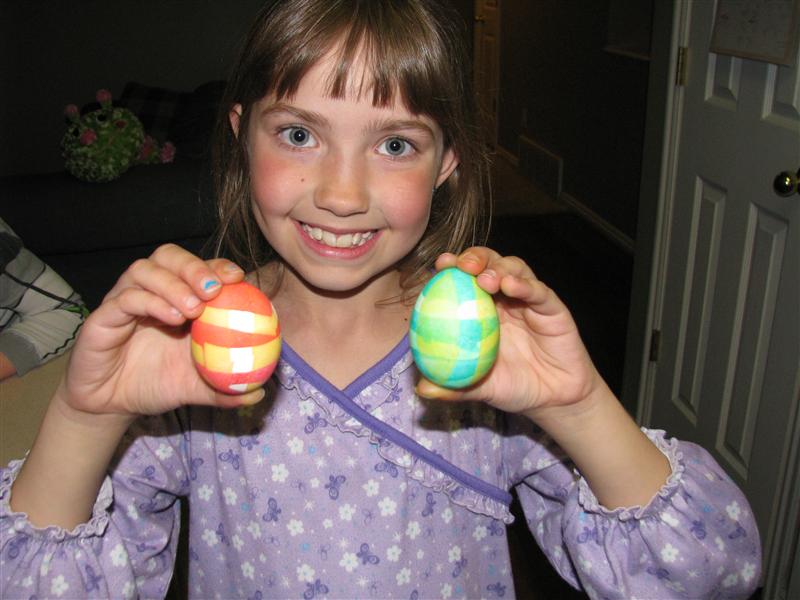
Put strips of tape around the egg going all one direction. Put the egg in the darkest color of dye first. Take out and let dry. Then peel the tape off.
Then put strips of tape around the egg going the opposite direction. Put the egg in the lighter color of dye.
Take out and let dry. Peel off the tape and check out the rad plaid!
Have an Egg-celent Easter!


1 comments:
Brilliant ideas! I wish I saw this before we did ours!
Post a Comment
Note: Only a member of this blog may post a comment.